Tuppahirekai/Ghosale/Gilki/Sponge Gourd bhajji

Dhamargava/Tuppahirekai/ತುಪ್ಪಹೀರೇಕಾಯಿ/Sponge Gourd or what is referred to as tirprikai in colloquial Kannada is a vegetable that belongs to ridge gourd family. Looks like a ridge gourd but it is without ridges. Since it is slightly unheard of for most people I spoke to, I am giving the names in different languages from web. Plus the pic is there to see and recognize 🙂

Marathi – Ghosale
Kannada – Tuppahirekai
Hindi – Ghiatorui/Gilki

Tuppahirekayi

Tuppahirekayi

The subzi can be made very similar to a Turai subzi but the interesting twist here is this is used to make a bhajji/pakoda. Monsoons are just beginning and what better way to enjoy a rainy evening. So here goes the recipe

Ingredients:

  • Besan/chickpea flour – 1/2 cup
  • Sponge-gourd – 1 medium(peeled and cut into round slices)
  • Hing – a pinch
  • Soda – If you wish to. I don’t add any
  • Ajwain – as per taste
  • Jeera/cumin – as per taste
  • Salt – as per taste
  • Red Chilli powder – as per taste
  • White sesame seeds – as per taste
  • Turmeric – a pinch
  • Coriander – finely chopped – again as per taste
  • Oil for frying and a tsp in the mix/batter
  • Water for preparing the mix

Method:

  • Peel, wash, dry and cut the sponge-gourd into round slices. Keep aside.
  • Add all the other above dry ingredients and mix.
  • Add a tsp of oil to the mixture.
  • Now gradually add water to the mixture to prepare the batter. Caution: Do not make the batter thin. Since sponge-gourd is high in water content if not coated properly oil splutters.
  • Heat oil for frying.
  • Now take a slice of the veggie, coat it with batter and deep fry to get nice bhajiyas 🙂
Tiprikai bhajji

Tiprikai bhajji

  • Eat it with any chutney/sauce you like.

I didn’t know how this is going to turn out but the moment I tasted the pakoras I knew I was on the money 🙂

Banana Dosa/Balehannu dose

Banana is a staple in this part of the world. A fruit available for all the 12 months of the year. And even most of our festival rituals include giving away fruits and mostly banana and betel leaves. On numerous such occasions where everyone is buying and giving away bananas one tend to go bananas wondering what to do with them. Here is nice way of including them in your food. This one will be relished by even those who normally don’t like banana.

The fruit has numerous health benefits ranging from providing vital micro-nutrients, aiding digestion, providing energy, improving mood, strengthen your bones, blood, hair,skin etc. Most people avoid it as it is fattening/high in sugar, a fact they conveniently forget while eating sweets and junk food.

Anyway here is the quick & simple recipe for Banana dosa/ಬಾಳೆಹಣ್ಣು ದೋಸೆ without any more ‘gyan’.

Ingredients:

  • Banana – 4 medium ones(ripe)
  • Rice – 1 cup
  • Water – for batter
  • Oil/Ghee – for frying
  • Salt – as per taste

Method:

  • Soak rice for about an hour
  • After it is soaked, grind the rice to make a coarse paste
  • Now add the bananas and grind again to make a fine paste
  • Once you are done, the batter for banana dosa is ready
  • Pour some oil/ghee on a hot flat tawa and spread the batter for delicious dosa.
Spread dosa batter

Spread dosa batter

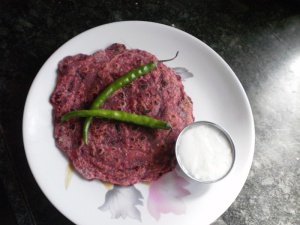
You can have this with any traditional dosa accompaniments or with some yumm sabzi, chutney and curd like we did.

Banana Dosa/Balehannu dose

Banana Dosa/Balehannu dose

Green Peas dal/Matar Dal – recipe

Yummy Matar ki dal

Yummy Matar ki dal

When my room-mate Rajni said matar ki dal I assumed it is a dish with green peas in some yellow dal. But this turned out to be a recipe I have never heard of. A dal made of green peas and cauliflower and no lentils. It is a recipe from Northern Uttar Pradesh(a region in Northern India). It tastes yummier than it sounds and very healthy too. And the recipe is very easy too. So I am posting it here for you guys to try and enjoy. This dish is prepared by my roomie Rajni. I am just the photographer and the helper here.

Ingredients:

  • Green Peas – 250 gms
  • Cauliflower – 250 gms
  • Onion – 1 big
  • Tomato – 1 medium
  • Garlic – 3-4 cloves
  • Fresh Coriander/Cilantro – quantity as desired
  • Ginger – a small knob
  • Green chilli- 2 medium
  • Dry Mango Powder – a pinch
  • Turmeric powder – a pinch
  • Bay leaf – 1 leaf
  • Cloves – 2-3
  • Black Cardamom – 1
  • Cinnamon – a small stick
  • jeera – for tadka
  • Salt – to taste
  • Mustard Oil – for frying

Method:

  • Blanch the peas and cauliflower. Set some peas aside and make the rest into a fine paste.
  • Make a paste of other ingredients as well i.e. Onion, tomato, chillies, garlic, ginger, cilantro.
Fresh ingredients. Replace the frozen peas with fresh ones for better taste

Fresh ingredients. Replace the frozen peas with fresh ones for better taste

Boil the peas for 2-3 mins.

Boil the peas for 2-3 mins.

Blanch the cauliflowers

Blanch the cauliflowers

Make a paste of the green peas

Make a paste of the green peas

  • In a frying pan, heat mustard oil, add jeera and the garam masala i.e. cloves, bay leaf, cinnamon and black cardamom.
  • Then add the onion paste and sauté for a minute or two. Add the green peas paste now and sauté for another minute.
  • Now add the rest of the peas and the cauliflower and fry for some time.
  • Add turmeric powder, salt, dry mango powder and any other dry masala that you’d like to add to this.
Fry all the pastes before adding the peas and cauliflower

Fry all the pastes before adding the peas and cauliflower

  • Add water to this and close the cooker. Let it cook for about 3-4 whistles.
Add peas and cauliflowers and fry. Then add desired amount of water.

Add peas and cauliflowers and fry. Then add desired amount of water.

After the pressure is released, you have your hot dal ready to be served. Garnish it with fresh coriander leaves and serve it with hot rice.

Serve the hot dal with some hot basmati rice, fresh salad and some hot-n-tangy chutney

Serve the hot dal with some hot basmati rice, fresh salad and some hot-n-tangy chutney

I hope you like trying this recipe and eating it as much as we did.

Okra/Bendikai/Bhendi Chutney

Okra/Bhendi is one  the vegetables you just can’t get enough. Here is one traditional Kannada recipe that most people don’t people don’t know of. It is a very simple, easy to make recipe and I am sure you’ll love it once you try.

Ingredients:

okra_chutney_ingre

okra_chutney_ingredients

  • Okra/Bhendi/ಬೆಂಡಿಕಾಯಿ – 1/4 kg
  • Green Chillies – 4-8 depending on your taste
  • Garlic – a few
  • Curry leaves – a few
  • Fresh Coriander leaves
  • Jeera/Cumin seeds
  • Salt
  • Oil

Method:

  • Take oil in a kadhai and fry the bhendi
fry_okra

fry_okra in oil

  • Once the okra is almost fried, add the other ingredients except salt and jeera
  • Once all are fried together let it cool for some time
  • Now grind the mixture along with salt and jeera
Chutney_ready

Chutney_ready

  • Now your chutney is ready to be had with hot roti.
  • You can also store it in the refrigerator for 3-4 days.
Chutney_plated

Chutney_plated

Spring Onion and Tomatoes – Recipe

Only those who have patience to do simple things perfectly will acquire the skill to do difficult things easily – Friedrich Von Schiller 

Spring Onion and Tomato

Spring Onion and Tomato

It’s amazing how, at times, doing the simplest of the things well can salvage a bad day. One such story of mine happens to be associated with this healthy, tasty and simple recipe. Hoping it do the same for someone else too and sharing it here on my blog.

Ingredients required:

Tomato(chopped) – 3 medium size
Spring Onion(chopped) – 2 bunches
Mustard seeds – 1/2 tsp
Cumin seeds – 1/2 tsp
Urad dal – 1/2 tsp
Curry leaves – a few
Onion chopped – 1/2 cup
Turmeric powder – a pinch
Hing – a pinch
Red chilli powder – 1 tbsp ( you can reduce the quantity if you don’t like it spicy)
Garam masala powder – a pinch
Salt – to taste
Oil – for tadka
Fresh Coriander/Cilantro(finely chopped) – for garnishing

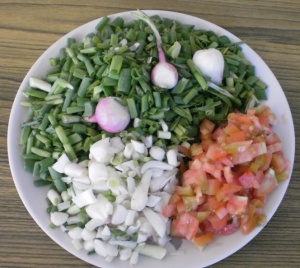
Fresh spring onion and tomatoes

Fresh spring onion and tomatoes

Method:

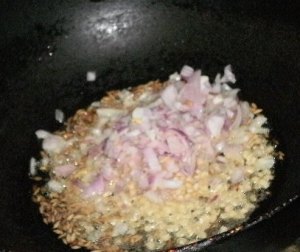
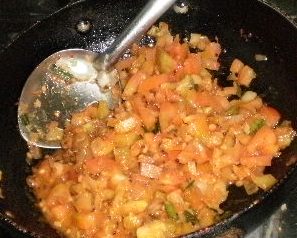
In a deep pan heat oil and add mustard seeds, cumin seeds and urad dal. When the seeds splutter add a pinch of hing, curry leaves, onion.

Tadka with onions

Tadka with onion

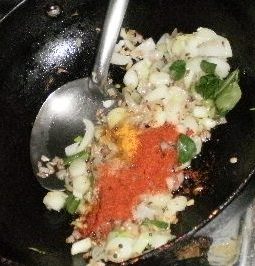
Saute the onions till they turn translucent add turmeric powder, garam masala, red chilli powder and salt

Tadka with turmeric and chilli powder

Tadka with turmeric and chilli powder

Now add the tomato to the mixture

with tomatoes

with tomatoes

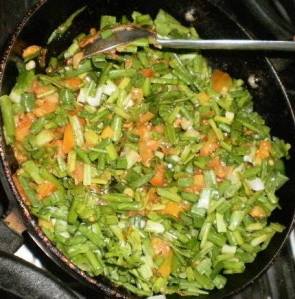
After the tomatoes are slightly done, add the chopped spring onion. Cover it for about 8-10 mins and let it cook.

with spring onion

with spring onion

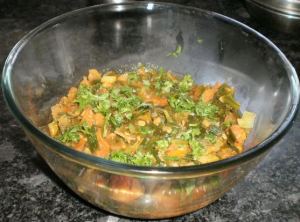
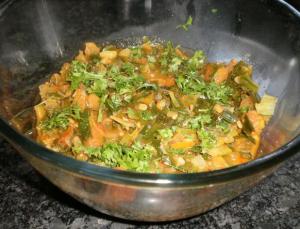
Add a little bit of water(about 2 tbsp) and let it cook for a minute. Now take it out in a serving bowl, garnish with fresh coriander and serve hot with any Indian bread or rice. This dish is usually prepared spicy but you can reduce the quantity of chilli powder if you don’t want it spicy.

Tasty, hot tomato and spring onion ready to be served

Tasty, hot tomato and spring onion ready to be served

Hope you enjoy making it and eating it! 🙂

Beetroot Paratha

Just a few months back cooking used to be my Bête Noire but lately I have started to fall in love with it. The more I cook, the more I love it. The best part is creating stuff everyday. Being creative to make the same old dishes more appealing and getting them right every time. Fortunately for me, I have my Mom(who just loves cooking) to help me out with new recipes and lend her experience.

Here is one of the recipes that I tried. As I was talking a few friends here I realized not many knew this recipe so I am posting it here. It is simple, easy, looks great, very healthy and great fun to prepare and eat. My Dad who hates beetroot also loved these parathas.

Beetroot Paratha

Yummy Beetroot Paratha

Ingredients:

1 medium-sized grated Beetroot
2 cups wheat flour
1 tsp Red chilli powder
1/4 tsp Ajwain seeds (ಅಜಮೋದ/ಓಮಾ)
1/2 tsp cumin seeds (ಜೀರಿಗೆ)
1/2 tsp white sesame seeds/till seeds ( ಬಿಳಿ ಯೆಳ್ಳು)
1/2 tsp garam masala(optional)
salt to taste
water – to knead the dough

Method:

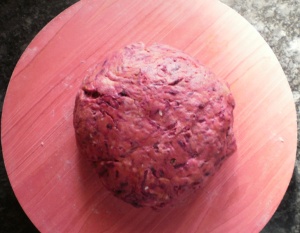
Mix all the ingredients above and knead to make dough with the same consistency as chapathi dough

Dough for beetroot paratha

Dough

Let the dough settle for about 30 minutes
Take small balls of dough and roll it out to make nice round parathas
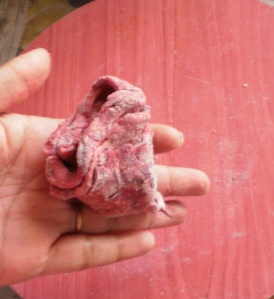
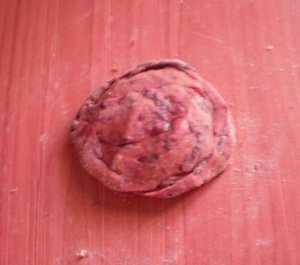
How you fold is entirely up to you so have fun with the shape of your Parathas! Below are the pictures of how I have done it.

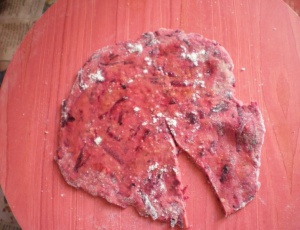
Beet Paratha to be folded

Sprinkle some oil and flour on rolled paratha and cut it as shown

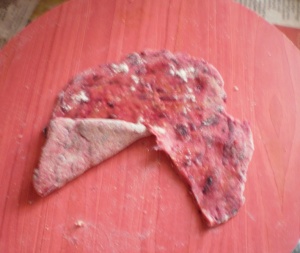
beet paratha folding 1
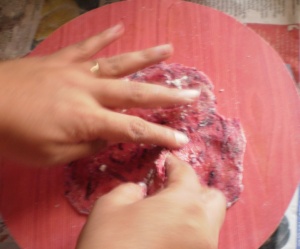
fold it to make a cone
beet paratha folding 2

fold it to make a cone

Beet Cone 1

Cone ready

Cone pressed

Cone pressed and ready to be rolled out

Once rolled, put on a hot tawa and fry till evenly browned and well cooked.
Serve hot and enjoy with curds, pickle and fried green chilli 🙂
Hope you have making and eating this dish!