Tangy and Tasty

What sets Indian cuisine apart from a lot of others is the spices. In fact, it is for these spices, the traders from all over the world came to India. Spices is what makes the Indian cuisine special. All the same you just don’t douse the food with spices. Which spice to add and how much is the essence of Indian cooking.

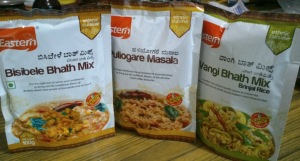
For the poor souls like me who don’t know all the spice proportions or don’t have time to prepare fresh spices every time, there is still hope. Unlike Vasco da Gama or those European traders we don’t have to cross the seven seas. Just go around the corner to the nearby store. In my case I simply had to reply to a review request for spice mixes by Eastern Condiments. And the spices landed at my door step.

Spices

Spices

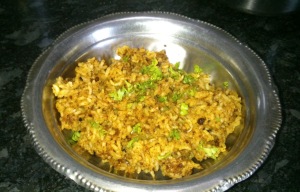
Puliyogare/ಪುಳಿಯೋಗರೆ/tamarind rice is a traditional South-Indian recipe. The mixture can be prepared and stored for a long time and mixed with rice while eating. And if you don’t know how to prepare the mixture. Here is a super-quick way to make it.

  • Heat about 2 & 1/2 tablespoons of cooking oil.
  • Add 4 tablespoons of Eastern Puliogare.
  • Stir for about 2 mins.
  • Add about 600 gms of rice and mix thoroughly.
Puliogare/Tamarind Rice

Puliogare/Tamarind Rice

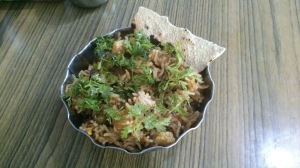
You may or may not relish brinjal but Vangi Bhath/Brinjal Rice is surely a dish you will relish. Again the method is simple.

  • Fry Brinjal and other vegetables of your choice with a pinch of turmeric in cooking oil and keep aside.
  • For the tempering, to heated cooking oil add mustard seeds, gram dal, green chilli, hing and cashew nuts.
  • To this add and stir fry about 3 & 1/2 teaspoons of Eastern Vangi Bhath powder, tamarind extract, shredded coconut(optional) , salt and jaggery.
  • Add the veggies and brinjal.
  • Add uncooked rice and mix them well.
  • Now add required amount of water for rice and let the rice cook.
Vangi Bhath/ Brinjal Rice

Vangi Bhath/ Brinjal Rice

While neither of these need any side-dishes, you can eat it with some nice hot papad or pickle. My mom prefers it with thin Majjige Saaru and I like it with thin coconut chutney.

Hope you try them out and love the dishes too 🙂 Thanks to Eastern Condiments for the spices. Made my long weekend at home a tasty one!
Banana Dosa/Balehannu dose

Banana is a staple in this part of the world. A fruit available for all the 12 months of the year. And even most of our festival rituals include giving away fruits and mostly banana and betel leaves. On numerous such occasions where everyone is buying and giving away bananas one tend to go bananas wondering what to do with them. Here is nice way of including them in your food. This one will be relished by even those who normally don’t like banana.

The fruit has numerous health benefits ranging from providing vital micro-nutrients, aiding digestion, providing energy, improving mood, strengthen your bones, blood, hair,skin etc. Most people avoid it as it is fattening/high in sugar, a fact they conveniently forget while eating sweets and junk food.

Anyway here is the quick & simple recipe for Banana dosa/ಬಾಳೆಹಣ್ಣು ದೋಸೆ without any more ‘gyan’.

Ingredients:

  • Banana – 4 medium ones(ripe)
  • Rice – 1 cup
  • Water – for batter
  • Oil/Ghee – for frying
  • Salt – as per taste

Method:

  • Soak rice for about an hour
  • After it is soaked, grind the rice to make a coarse paste
  • Now add the bananas and grind again to make a fine paste
  • Once you are done, the batter for banana dosa is ready
  • Pour some oil/ghee on a hot flat tawa and spread the batter for delicious dosa.
Spread dosa batter

Spread dosa batter

You can have this with any traditional dosa accompaniments or with some yumm sabzi, chutney and curd like we did.

Banana Dosa/Balehannu dose

Banana Dosa/Balehannu dose

Hirekai/Ridge Gourd peel chutney

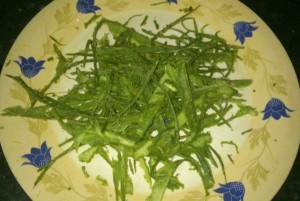
Hirekai/ಹೀರೇಕಾಯಿ/Ridge gourd is supposed to contain loads of nutrients. Just like the vegetable,  the skin/peel also has its benefits but we throw it away. Not any more. Here is a nice way to utilize that.

Ridge gourd peel

Ridge gourd peel

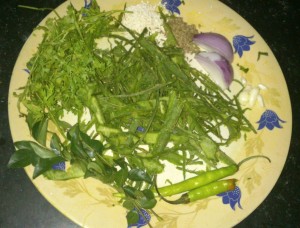
Ingredients:

  • Hirekai/Ridge gourd peel – I have taken peels from three medium-sized gourds
  • Garlic – 2-3 pods(optional)
  • Onions – 1/2 small(optional)
  • Dry/desiccated coconut powder – a little
  • White sesame seeds – 1/2 tbsp
  • Jeera – 1/2 tbsp
  • Salt – as per taste
  • Green Chilli – 1 & 1/2
  • Curry leaves
  • Coriander/Cilantro
  • Oil – 1 tbsp – for frying
  • Jaggery/sugar – optional
  • Lemon – 1/2 big
chutney ingredients

chutney ingredients

Method:

  • Heat oil in a kadhai. Add the ridge gourd peel, onion, garlic, curry leaves and coriander and sauté for 7-8 minutes on a medium flame.
  • Towards the end, add all the other ingredients except salt and lemon and take it off the heat.
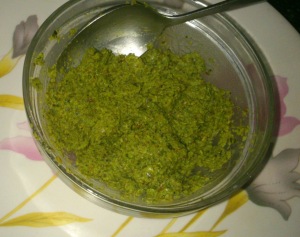
  • Once the mixture cools down, grind it to a coarse paste along with salt, water and lemon.
Hirekai Chutney

Hirekai Chutney

  • You can add tempering to the chutney to give it more taste. I haven’t in this case.
  • Also you can add roasted groundnut powder instead of coconut powder. That works beautifully too.

Tasted best with roti of any kind 🙂

Green Peas dal/Matar Dal – recipe

Yummy Matar ki dal

Yummy Matar ki dal

When my room-mate Rajni said matar ki dal I assumed it is a dish with green peas in some yellow dal. But this turned out to be a recipe I have never heard of. A dal made of green peas and cauliflower and no lentils. It is a recipe from Northern Uttar Pradesh(a region in Northern India). It tastes yummier than it sounds and very healthy too. And the recipe is very easy too. So I am posting it here for you guys to try and enjoy. This dish is prepared by my roomie Rajni. I am just the photographer and the helper here.

Ingredients:

  • Green Peas – 250 gms
  • Cauliflower – 250 gms
  • Onion – 1 big
  • Tomato – 1 medium
  • Garlic – 3-4 cloves
  • Fresh Coriander/Cilantro – quantity as desired
  • Ginger – a small knob
  • Green chilli- 2 medium
  • Dry Mango Powder – a pinch
  • Turmeric powder – a pinch
  • Bay leaf – 1 leaf
  • Cloves – 2-3
  • Black Cardamom – 1
  • Cinnamon – a small stick
  • jeera – for tadka
  • Salt – to taste
  • Mustard Oil – for frying

Method:

  • Blanch the peas and cauliflower. Set some peas aside and make the rest into a fine paste.
  • Make a paste of other ingredients as well i.e. Onion, tomato, chillies, garlic, ginger, cilantro.
Fresh ingredients. Replace the frozen peas with fresh ones for better taste

Fresh ingredients. Replace the frozen peas with fresh ones for better taste

Boil the peas for 2-3 mins.

Boil the peas for 2-3 mins.

Blanch the cauliflowers

Blanch the cauliflowers

Make a paste of the green peas

Make a paste of the green peas

  • In a frying pan, heat mustard oil, add jeera and the garam masala i.e. cloves, bay leaf, cinnamon and black cardamom.
  • Then add the onion paste and sauté for a minute or two. Add the green peas paste now and sauté for another minute.
  • Now add the rest of the peas and the cauliflower and fry for some time.
  • Add turmeric powder, salt, dry mango powder and any other dry masala that you’d like to add to this.
Fry all the pastes before adding the peas and cauliflower

Fry all the pastes before adding the peas and cauliflower

  • Add water to this and close the cooker. Let it cook for about 3-4 whistles.
Add peas and cauliflowers and fry. Then add desired amount of water.

Add peas and cauliflowers and fry. Then add desired amount of water.

After the pressure is released, you have your hot dal ready to be served. Garnish it with fresh coriander leaves and serve it with hot rice.

Serve the hot dal with some hot basmati rice, fresh salad and some hot-n-tangy chutney

Serve the hot dal with some hot basmati rice, fresh salad and some hot-n-tangy chutney

I hope you like trying this recipe and eating it as much as we did.

Bajra Roti

Bajra Millet

Bajra Millet

After registering for the Marathon, I decided to eat healthy but cornflakes or plain oats aren’t my kind of food. I’ll go for poha, idli, upma any day (Of course they need to be prepared nicely not the hostel-food kind).  So I started looking for other options and that reminded me of bajra rotis which are usually prepared around Sankranti time. They are an awesome food esp during winters.

One thing I totally love about the healthy food fads is millets are back in style. Bajra/Pearl millet/ಸಜ್ಜೆ is one of them. It is a gluten -free grain and comes with a plenty of other benefits.

Here is how to make some tasty rotis. They are made the same way as Jowar/Sorghum rotis. For better pictures and a more detailed recipe check this out and just replace jowar with bajra. In this recipe, I have added some jowar with bajra and also some more spices to make the roti tastier.

Ingredients:

  • Bajra atta – 1/2 cup
  • Jowar atta – 1 tbsp
  • salt – to taste
  • red chilli powder – to taste
  • turmeric – to taste
  • white sesame seeds/till – to taste
  • Hot water for kneading the dough
Ingredients

Ingredients

Method:

Bring the water to boil.

Bring the water to boil.

Start kneading with the spoon. You can use your hands and cold water once you add hot water and mix

Start kneading with the spoon. You can use your hands and cold water once you add hot water and mix

  • Don’t put all the water at once. Keep adding a little every time. Also, use a spoon to mix the water as it is very hot.
knead the dough properly to get nice rotis

knead the dough properly to get nice rotis

Take a small portion of the dough and make it into a ball

Take a small portion of the dough and make it into a ball

Use a rolling pin or flatten the roti using your hands

Use a rolling-pin or flatten the roti using your hands

Once rolled out, put it on hot tava. Make sure the tava is hot for good rotis

Once rolled out, put it on hot tawa.

  • Make sure the tawa is hot for good rotis. In the next few seconds, as the roti gets a little dry, use a clean muslin cloth and apply a thin layer of water on the upper surface.
  • Let it remain till water evaporates a little and flip it over and press slightly with a soft cloth to make sure it is done properly on all sides.
Roti flipped over

Roti flipped over

You can eat it with any subzi, but I can’t wait these rotis so I am eating it right away with cucumber slices, sprouts, channa dal/ಪುಟಾಣಿ chutney and awesome curd.

Hot bajra roti ready to eat :)

Hot bajra roti ready to eat 🙂

Rava Dosa – Recipe

Rava Dosa

Onion Rava Dosa with Coconut chutney

If you are craving for dosa and if you have forgotten to soak the rice and dal the previous day and keep the batter overnight then you are in for a disappointment. That is when instant dosa comes to your rescue. This is one of the instant dosas and a yummy one at that . Here are the ingredients you’ll need

  • Rava/Semolina – 1 cup
  • Rice Flour – 1 cup
  • Maida/All purpose flour – 1/2 cup
  • Green chillies(finely chopped) – 3 medium
  • Onion(finely chopped) – 1 large
  • Cumin seeds – 1 tsp
  • Hing/ Asafoetida – a pinch
  • Ginger(grated) – 1/2 tsp
  • Salt – to taste
  • Water – to make the batter
  • Oil – for making the dosas

Method:

  • In a mixing bowl, mix rava, rice flour, maida, chopped green chillies, cumin seeds, ginger, hing and salt.
Dry ingredients

Dry ingredients

  • Then add water to this dry mixture. The consistency should be that of buttermilk. I tried getting a pic not sure if you can make out from the pic.
Batter consistency

Batter consistency

  • Keep it aside for 10 mins. Now heat the dosa-tawa, apply some oil and sprinkle a bit the finely shopped onion
Sprinkle Onion

Sprinkle Onion

  • You cannot spread this dosa batter with a ladle like the other dosas because the batter is very thin. You need to pour the batter and swirl the tawa or sprinkle the batter starting from outside and finishing in the centre and filling the gaps later. In this pic I have sprinkled the dosa but the gaps need to be filled.
Sprinkle the dosa batter on the tawa

Sprinkle the dosa batter on the tawa

  • Now put some more oil on the dosa. Keep the tawa on high heat and remember this one takes a little more time than your normal dosa. Once you see the dosa getting brown on the bottom side, flip it with a spatula.
Dosa on the tawa

Dosa on the tawa

  • Don’t worry about the shape of the dosa when you sprinkle the batter like water you can’t expect it to take any shape that you can define unless it resembles a country map 🙂
  • In case you cannot flip it, that means either you haven’t cooked it properly on the other side or that it is too thick. Don’t worry you can still cook and eat those dosa crumbles if browned properly 🙂
  • Anyway if it doesn’t come out properly, don’t despair. For the next one pray to your favorite god and start again from cleaning your tawa, adding some oil and sprinkling some onions on it. Keep repeating the above steps till you get a nice, brown, crispy dosa. You will get it soon. It ain’t no rocket science!
  • And once done, take it out on a plate and eat it hot with any of the dosa accompaniments.
Rava Dosa ready to eat

Rava Dosa – ready to eat.
Awesomeness \m/


Spring/Green Onion Paratha – Recipe

One of the best things about paratha is the variety. One paratha place in my area has 99 different types on their menu. You can have it plain, stuff it with one of your favorite veggie, or two veggies or mix them all and call it a mix-veg paratha 🙂 Have also posted beetroot paratha previously. This is one of the many varieties you should try out some time. A spring onion or a green onion paratha.

Spring Onion Paratha

Spring Onion Paratha

Ingredients required:

Finely chopped spring onion(green part) – 1 cup
Finely chopped Onion – 1/2 cup
Wheat atta – 1 and 1/2 cup
Besan/Chickpeas flour – 2 tbsp
Chilli powder – 1 tsp
Garam masala powder – 1 tsp
Cumin seeds – 1 tsp
Salt – to taste
Moong dal(soaked for about 2 hours) [optional] – 1/2 cup
oil – 1 tbsp to knead the dough
Ghee – to fry the parathas
water – to knead the dough

Ingredients for Spring paratha before kneading

Ingredients for Spring paratha before kneading

Method
Mix all the above ingredients and knead it into a soft dough with the same consistency as Chapathi dough. And let it rest for about 30 mins.

Spring Paratha dough

Spring Paratha dough

Pinch out required quantity of the dough to make a small ball. Dust the pinched out ball in wheat flour and roll it out using a rolling-pin to a round shape(or at least nearly round as in my case 🙂 ) . Then sprinkle some flour on it and lightly coat it with ghee/oil.

ball dusted

Pinch some dough to make a small ball and dust it with wheat flour

Roll it out nearly round

Roll it out a little to a round shape( at least nearly round)

Fold it twice to make a triangle.

Spring paratha triangle

Spring paratha triangle

Now roll it out to make a nice paratha.

Paratha rolled out

Paratha rolled out

Heat a tawa and when heated put the rolled out paratha on the tawa and add ghee on one side. When done flip and apply ghee to the other side as well.

Spring Paratha on the tava

Spring Paratha on the tava

Once it is done properly on both the sides take it out and serve it hot with curds or pickle or tomato ketch and some potato chips as I did.

Spring Paratha - ready to serve

Spring Paratha – ready to serve

Happy Eating! 🙂

Homemade Potato Chips – Recipe

I wonder what would life be without deep-fried potatoes. Can there be anything better than crispy,crunchy, deep-fried potato slices? May be in some parallel universe. For now here’s how you can make some awesome crispy potato chips at home which are way more better than the store-bought ones – no preservatives, no unknown ingredients, you know what kind of oil you have used and not to forget more economical.

The potatoes need to be fresh and firm for this to get nice results. Look for firm potatoes without any green spots or sprouting.  Here are the ones I used.

Potatoes

Potatoes

Peel the potatoes nicely and wash it clean. Slice the potatoes even and thin. Evenness ensures that the potatoes are cooked evenly. To slice, you can use a knife, peeler or a slicer like the one I used.

Slicer

Slicer

Soak the slices in a cold water(with a pinch of alum) for 10-15 mins. This helps remove the excess starch. The alum helps retain the color.

Soaked potato slices

Soaked potato slices

Drain potato slices and dry them thoroughly with a clean kitchen towel or layers of paper towels.

Potatoes dried using a cotton cloth

Potatoes dried using a cotton cloth

Heat oil in a large, deep pan. Add potato slices to the oil and fry them till golden brown. Fry them on a medium heat instead of high to make sure they become crispy.

Chips frying in the pan

Chips frying in the pan

Transfer the chips to a paper towel and sprinkle some salt and black pepper powder or any other seasoning you like. Let them cool before transferring the contents to an air-tight container. These can be stored up to a month. That is, if any, remains un-eaten for that long.

Crispy, Crunchy home-made potato chips

Crispy, Crunchy home-made potato chips. No one can eat just one 🙂

Spring Onion and Tomatoes – Recipe

Only those who have patience to do simple things perfectly will acquire the skill to do difficult things easily – Friedrich Von Schiller 

Spring Onion and Tomato

Spring Onion and Tomato

It’s amazing how, at times, doing the simplest of the things well can salvage a bad day. One such story of mine happens to be associated with this healthy, tasty and simple recipe. Hoping it do the same for someone else too and sharing it here on my blog.

Ingredients required:

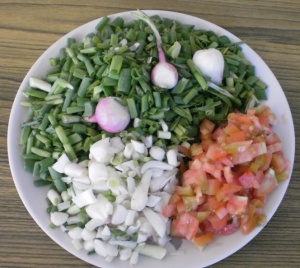
Tomato(chopped) – 3 medium size
Spring Onion(chopped) – 2 bunches
Mustard seeds – 1/2 tsp
Cumin seeds – 1/2 tsp
Urad dal – 1/2 tsp
Curry leaves – a few
Onion chopped – 1/2 cup
Turmeric powder – a pinch
Hing – a pinch
Red chilli powder – 1 tbsp ( you can reduce the quantity if you don’t like it spicy)
Garam masala powder – a pinch
Salt – to taste
Oil – for tadka
Fresh Coriander/Cilantro(finely chopped) – for garnishing

Fresh spring onion and tomatoes

Fresh spring onion and tomatoes

Method:

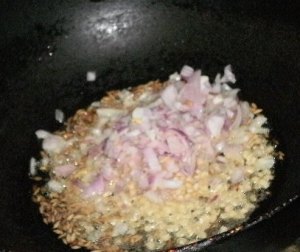
In a deep pan heat oil and add mustard seeds, cumin seeds and urad dal. When the seeds splutter add a pinch of hing, curry leaves, onion.

Tadka with onions

Tadka with onion

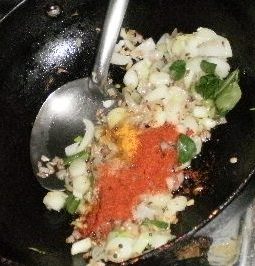
Saute the onions till they turn translucent add turmeric powder, garam masala, red chilli powder and salt

Tadka with turmeric and chilli powder

Tadka with turmeric and chilli powder

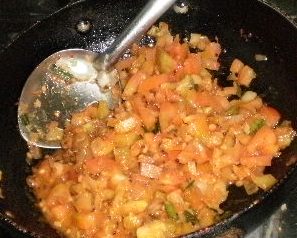
Now add the tomato to the mixture

with tomatoes

with tomatoes

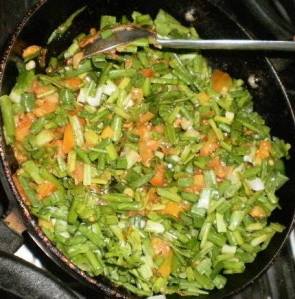
After the tomatoes are slightly done, add the chopped spring onion. Cover it for about 8-10 mins and let it cook.

with spring onion

with spring onion

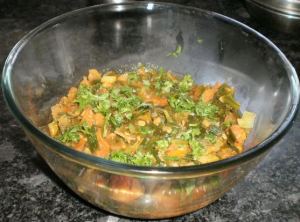
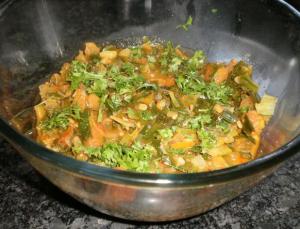
Add a little bit of water(about 2 tbsp) and let it cook for a minute. Now take it out in a serving bowl, garnish with fresh coriander and serve hot with any Indian bread or rice. This dish is usually prepared spicy but you can reduce the quantity of chilli powder if you don’t want it spicy.

Tasty, hot tomato and spring onion ready to be served

Tasty, hot tomato and spring onion ready to be served

Hope you enjoy making it and eating it! 🙂